
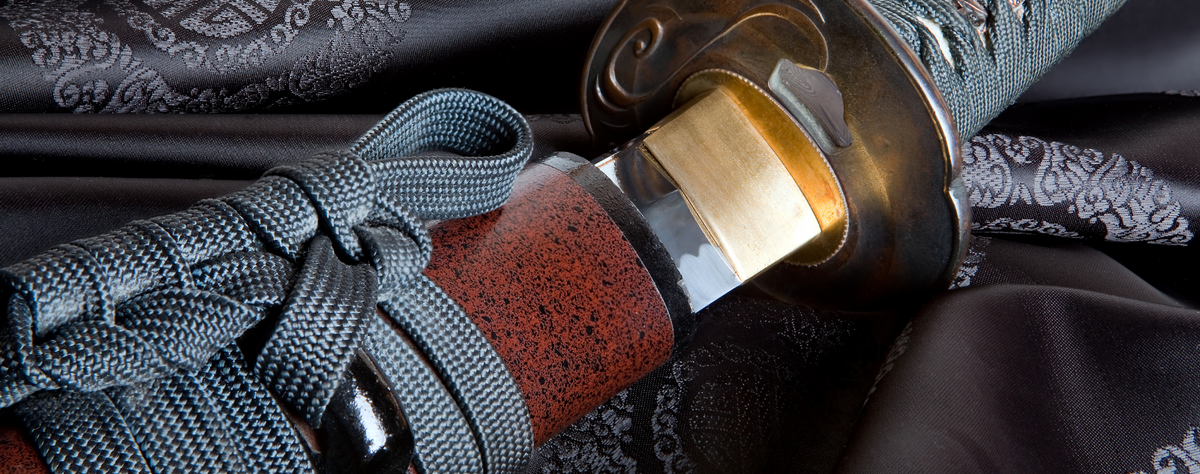
Japanese swordsmiths devote their lives to learning how to make a katana worthy of its legendary status as a national treasure and an embodiment of Japanese sword craftsmanship. It is an elegant bladed piece whose making has spiritual foundations.
That does not mean you cannot make a katana in your garden, your garage or a makeshift workshop. Even though a home-made sword will not win the approval and certification of Japanese experts, you can still produce a katana worth displaying or using as a cosplay prop.
But how? Consider yourself lucky, because we are going to walk you through the steps for making a Japanese sword as close to the original as possible. Let's begin.
Traditional katana making: not for everyone
The katana. The pride and national treasure of Japan. A symbol of unmatched dedication to craftsmanship, attention to detail and an unmatched understanding of "beauty in simplicity".
It is therefore no surprise that the Japanese government and the Society for the Preservation of Japanese Art Swords (Nihon Bijutsu Token Hozon Kyokai, or NBTHK) regard high-quality katanas as works of art deserving of the title "national treasure".
Becoming a katana swordsmith is not as simple as it is for other swordsmiths around the world. You must apply for permission from the Agency for Cultural Affairs of Japan's Ministry of Education, Culture, Sports, Science and Technology. Once you have the government's green light, your journey to becoming a katana swordsmith begins.
The next step is to serve an apprenticeship of at least five years under a katana swordsmith (katana-kaji) licensed by the prefectural public safety commission.
This requirement is essential, because only a master katana-kaji can teach an apprentice the correct techniques for forging tamahagane steel, along with the history and cultural significance of making a katana.
It is worth stressing that traditional Japanese forging is a matter of generations. From Masamune to Gono and Awataguchi, the ancient Japanese tradition of sword-making lives on, with masters passing centuries-old know-how on to their disciples.
And if you are wondering how many licensed katana-kaji there are, there were 188 in 2017.
Katana-kaji take their craft seriously. They can submit their creations to the NBTHK for evaluation, which allows them to obtain one of four classifications.
- Hozon (yellow certificate or "origami") - the katana is worthy of preservation
- Tokubetsu Hozon (brown origami) - the katana is especially worthy of preservation.
- Juyo Token (oshigata rubbing of the tang or nakago and/or paper photo) - the katana is an important work.
- Tokubetsu Juyo Token (oshigata rubbing of the tang or nakago and/or paper photo) - the katana is an especially important work.

Juyo Token (left) and Tokubetsu Juyo Token origami. Images by New Unique Japan.
Note that a single katana-kaji can submit ten katanas and only two of them will receive the Tokubetsu Hozon designation. Of the 10,000 katanas classified Juyo Token, only 700 are Tokubetsu Juyo Token.
It is therefore no wonder that these swords can fetch thousands of pounds.
These figures underline Japan's strict requirements and how they reflect the expertise of a katana-kaji. The lesson? Just because you hold a PPSC licence does not mean you automatically have NBTHK-certified katanas.
How to make a katana, home-made style
Making katanas in Japan is not easy. The learning curve is stressful enough. Add strict regulatory requirements and you have the perfect recipe for a rare skill set. But don't worry. You are not in Japan, and you can create a katana without going through the apprenticeship and without submitting the sword for NBTHK evaluation and classification.
Step 1. Choose your materials.
Katana-kaji use tamahagane steel to make their katanas. It is a rare iron ore from precious iron sands (Satetsu) found only in certain regions of Japan. Japanese swordsmiths combine the Satetsu with pine charcoal (Matsuzui) to produce an odd-looking grey-black mass called a "bloom of steel".
Making tamahagane steel is a job of 36 to 72 hours, during which Satetsu is added every 10 minutes, then melted and turned. In addition, katana-kaji use a special, single-use clay shaft furnace (Tatara).
Using tamahagane to make a katana yourself is therefore out of the question. The following alternatives will do.
Carbon steel
Preferred by many katana makers, carbon steel imitates the hardness and strength of tamahagane. However, katana makers must choose the right carbon steel to produce the best replica of a Japanese sword.
Here is a tip. Carbon steel has a four-digit rating (for example 1045 and 1095). You can ignore the first two digits and concentrate on the last two, which indicate the percentage of carbon in the steel. For example, a 1045 carbon steel contains 0.45% carbon, whereas a 1095 steel contains 0.95%.
Authentic tamahagane katanas often contain between 0.5% and 0.7% carbon. A 1060 carbon steel should therefore be perfect.
Spring steel
The material of this katana replica differs from carbon steel through the addition of silicon in its chemical composition. It gives the sword exceptional malleability and flexibility. You have two choices: 5160 and 9260.
5160 spring steel contains little silicon and a chromium alloy, which gives the sword remarkable durability and strength. By contrast, 9260 spring steel contains more silicon. This composition allows the steel to keep its shape even after being bent to 90 degrees.
Tool steel
Tool steel is the ideal solution if you want to create a tough katana that holds its edge perfectly. Unfortunately, these metals are expensive.
T10 is perfect for katana makers who need a Japanese sword that resists abrasion and scratches. This tool steel contains tungsten, which gives it impressive characteristics.
Although it is the most expensive tool steel, L6 Bainite outperforms T10 in toughness, because it contains few alloys.
You may also be interested in Damascus steel or other types of folded steel. The striking patterns of these metals make it possible to create a one-of-a-kind katana. Unfortunately, adding too many aesthetic elements to the katana can detract from its "simple but beautiful" ethos.

Some katana enthusiasts claim that stainless steel is an excellent material for katanas. Although its shine is unmatched, stainless steel blades longer than 30.4 centimetres or 12 inches are brittle. They can break easily on impact. You can, however, use stainless steel if you commit to keeping the katana ONLY on its display stand.
Here is what you need to know. The blade of a Japanese katana measures 60.6 centimetres from tip to tang. That is about double the acceptable limits of stainless steel.
Ideally, the length of the katana steel should allow for adjustments during forging. We recommend a single block of steel measuring half an inch thick (1.27 centimetres), two inches wide (5.1 centimetres) and 40 inches long (101.6 centimetres).
Step 2. Prepare the furnace.
Learning to make a katana is a real challenge. Even the best katana-kaji will need 12 months to finish a single sword, half of which is devoted to the blade (Nagasa) and tang (Nakago). A further six months are needed to apply the aesthetic touches that make the katana worthy of NBTHK certification.
A hot, fiery furnace is essential for forging a katana, whether you are a katana-kaji or a DIY enthusiast. You need enough fuel to maintain a scorching temperature of 1,600 degrees Fahrenheit (about 870 degrees Celsius).

A katana-kaji preparing the furnace. Image provided by Japan Endless Discovery.
This temperature is crucial for "softening" the katana steel, which allows it to be forged and the "slag" or impurities to be removed. The aim is to give the metal a bright yellow-orange appearance. And that is only possible at extremely high temperatures.
There is no shortage of fuel for making a katana. Some use charcoal, because swordsmiths can push the steel into the glowing coals before hammering and shaping it. But charcoal is expensive, which makes wood an attractive alternative for budget-conscious DIY enthusiasts.
When the furnace is at the right temperature, you are ready to forge.
Step 3. Forge the steel.

A katana-kaji forging a katana. Image by Nippon.com.
This step is the hardest. Seasoned katana-kaji spend at least a dozen weeks forging tamahagane into a rough katana-like object. You do not need that much time to create a katana.
- Heat the steel in the furnace until it turns orange-yellow.
- Place the katana steel on an anvil and strike it with a hammer.
- Remember to turn the metal bar while you forge the katana.
- If hammering does not change the appearance of the steel or if it is no longer glowing, reheat it in the furnace.
- Bend the heated, malleable steel to create the characteristic shape of the katana.
Note that this Japanese sword has a curved Nagasa. Imagine a line running from the hand guard (Tsuba) to the tip of the Nagasa (Kissaki). Then measure the distance between the back of the blade (Mune) and this imaginary line. You will get about 1.5 centimetres (0.6 in). This is the Sori, or curvature.
- Focus your hammer blows on one section at a time, respecting the ideal proportions of the katana.
- Once the basic shape of the katana is defined, forge the Kissaki.
- Work the bevel and the Sori. The katana has an emblematic two-tone appearance: a thick, dark spine (back, or Mune) and a light, keen cutting edge (Ha). A bevel separates the two.
- The end of the blade opposite the Kissaki is hammered out to form the tang.
Note: making a katana (forging) requires constantly heating, hammering, shaping and reheating the blade to obtain the desired shape. This is why experienced swordsmiths may take several days to forge a katana, and beginners longer.
Step 4. Shape the blade.
Hammering alone will not produce the characteristic look of a katana. You will therefore need other tools to refine its shape.
You can use a combination of file and grinder to give the blade its "near-ideal" shape. A photo of a katana should help you "mould" the Nagasa into the correct shape.
Step 5. Clay-coat the blade.
A unique feature of the katana is the Hamon, which marks the line between the soft but sharp Ha and the supple but sturdy Mune. Katana-kaji use clay and charcoal to produce this attribute of the katana.
Take a piece of clay and coat the thick spine of the blade, thinning the substance towards the Ha. Leave the cutting edge exposed and return the blade to the furnace.
The clay-covered part heats more slowly than the exposed Ha, thus creating a softer, more flexible core (Mune).
Step 6. Quench the katana steel.
Quenching the blade helps it cool and harden. The Ha cools much more quickly, which allows it to contract and pull the hot Mune into a reverse curve. As it cools, the Mune contracts, which creates tension in the Ha and strengthens its bond with the Mune.
Ideally, immerse the Kissaki and the Ha in water or oil before moving on to the Mune. This technique strengthens and hardens the cutting edge, while giving the Mune the ability to absorb impacts without breaking.
Step 7. Temper the katana blade.
Tempering strengthens the blade and is a crucial step in learning to make a katana.
Reduce the furnace temperature to about 204.4 degrees Celsius or 400 degrees Fahrenheit and reheat the blade immediately after quenching. Let the katana cool naturally to room temperature.
Step 8. Polish and sharpen the katana.
Remove the layer of clay and charcoal from the Nagasa and use a whetstone or sandpaper to polish the katana. You can also sharpen the Ha to give it a razor edge.
Inspect the katana and sand or file down any parts with imperfections for a more refined look. Do not forget to drill two holes in the tang to fix the katana to the handle or hilt (Tsuka).
Step 9. Create the katana fittings.
You will need a handle (hilt, or Tsuka) and a hand guard (Tsuba) for your katana.
Most katanas have a circular Tsuba, but you can create a square with rounded corners, an oval and other shapes. Cut a slot in the centre of the Tsuba, large enough for the blade to pass through.
The Tsuka, meanwhile, must be long enough to be held with two hands. After all, a katana is a two-handed sword. Most katana DIY makers use alder, tulip poplar or another hardwood for exceptional strength. Drill holes for anchoring the tang.
Design and make the end cap or pommel (Kashira).
Step 10. Assemble the katana.
Hold the blade and insert the tang into the slot of the Tsuba and into the Tsuka. Secure the tang with copper or brass pins and apply an industrial-grade adhesive to prevent the tang from working loose.
Wrap the Tsuka with a strip of leather or any other material. Fit the Kashira, inspect your work one last time and apply any other finishes you want.

Final words
Learning to make a katana is easy with the DIY method. Although it takes elbow grease, the finished product should be its own reward. You now have a piece that you can display at home, show to your friends or even use in cosplay.
Of course, you can always buy a replica or imitation katana from trusted shops and spare yourself the heat, the constant hammering and the risk of creating a Japanese sword unworthy of the legend.
Share:
The Most Famous Japanese Swords: Tenka Goken and Legends
How Can You Tell if Your Katana Is Authentic?